Connect Stripe via an API Key
If you're not able to connect to Stripe via OAuth (ex: your Stripe account was created by Dubsado or Thrivecart), you can connect by using an API key. It's a few more steps, but definitely still easy!
Step 1: Log into your Stripe dashboard
- Open Stripe in a new tab: https://dashboard.stripe.com
- Make sure you’re in the correct Stripe account (if you have more than one).
Step 2: Create a Restricted API Key
This key gives Mabel read-only access.
It cannot create charges, refunds, or payouts.
- In the Stripe left sidebar, click Developers (down at the bottom)
- Click API Keys
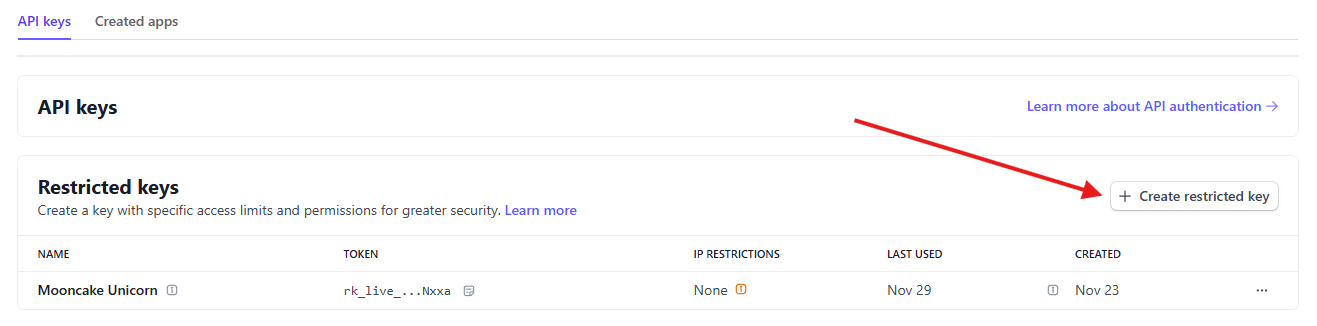
- Scroll to Restricted Keys
-
Click + Create restricted key
-
Choose "Building your own integration" (just go with us on this! 🤣) then Continue.
Step 3: Set permissions
-
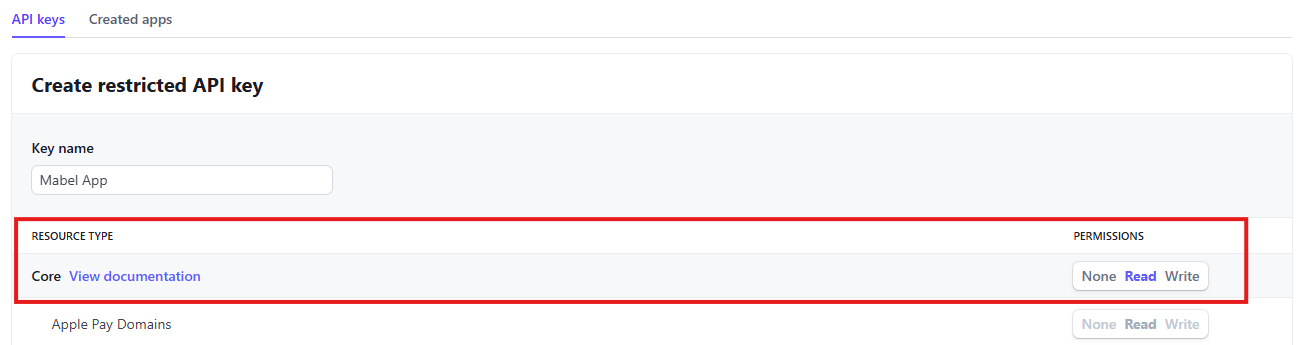
Give the key a name. You can use any name you like. Ex:
- "Mabel App"
- "Stripe → QuickBooks Integration"
-
You only need TWO permissions:
-
Set "Core" permission to "Read"
-
Scroll down a bit and set "Billing" permission to "Read"

Everything else can stay off.
-
Step 4: Create and verify the key
- Scroll aaalllll the way to the bottom of the page
- Click Create key
- Stripe will probably ask you to verify your identity, so click "Send verification" and verify your identity. (You know, like you’ve done hundreds of times before).
- After verifying, Stripe returns you to the API key page
- Copy your new key. It starts with
rk_live_
⚠️ Stripe will not show this key again.
(But don't worry, if something goes wonky, you can delete it and make a new one.)
Step 5: Paste the key into Mabel
Back in the Mabel app:
- From the left sidebar, click Settings
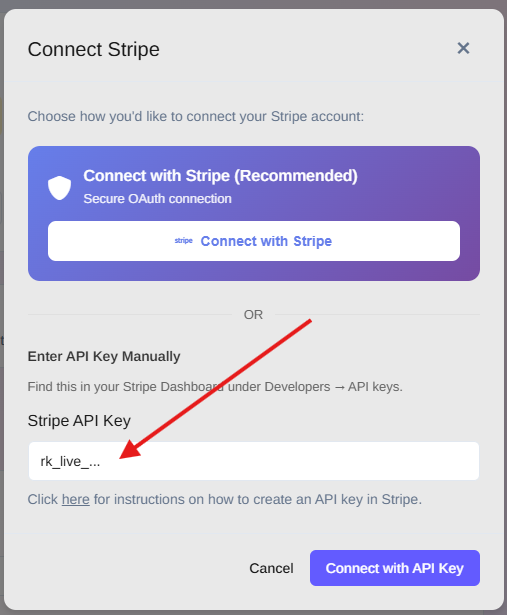
- In the Stripe Connection box, click Connect
-
In the window that pops up, paste in your API key.
-
Click Connect with API Key (the window will then close)
- Click Test Connection to make sure everything is working
If the key is correct, you’ll see a success message.
Your Stripe account is now connected.
Woot!! That was the hardest part of the whole setup.
👉 Next step: Connect QuickBooks