Match Your Deposits in QuickBooks
This is the final step in the setup process.
Once your payouts have been sent to QuickBooks from Mabel, you’ll match them to
your actual bank deposits inside QuickBooks Online.
This confirms that:
- the payout was recorded correctly
- the deposit is linked to the right bank account
- your bookkeeping is accurate and complete
Step 1: Go to your bank feed in QuickBooks
- Log into QuickBooks Online
- Go to the Bank Transactions page (the easiest way to do this if you don't know your way around is to type "bank transctions" in the search bar at the top of the page)
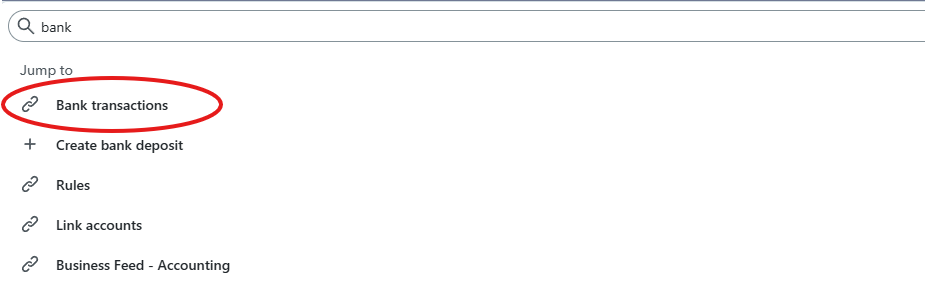
- Choose the bank account where your Stripe payouts are deposited. You'll see a list of transactions wawiting to be reviewd.
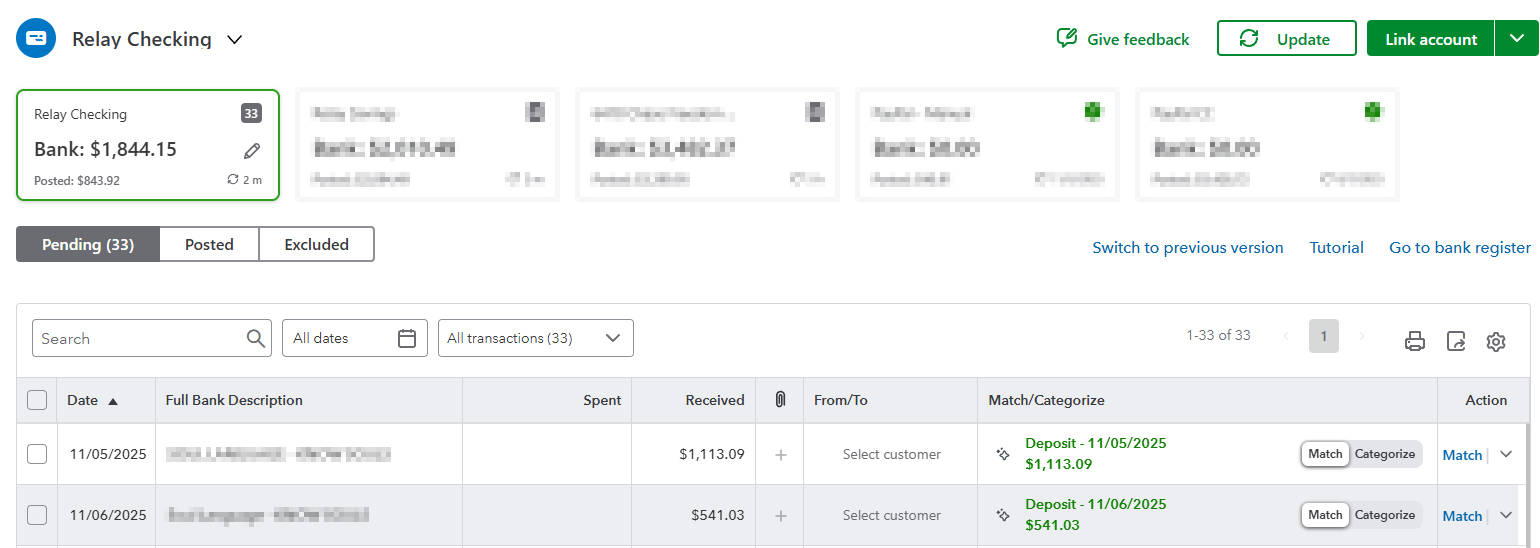
Step 2: Match the deposit
- You should see a bank transaction that matches the deposit that Mabel created.
-
QuickBook will match the deposit Mabel created to the deposit that came through the bank feed. All you need to do is click "Match".

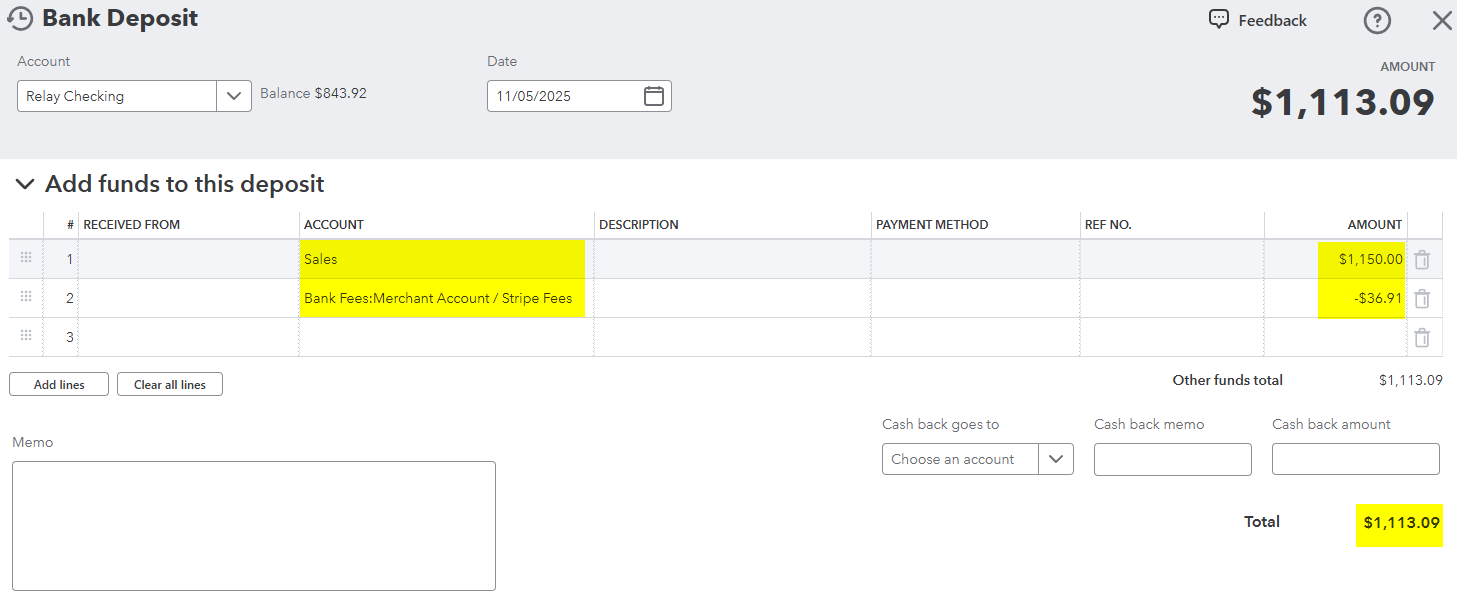
If you're curious about what actually got created in QuickBooks...
Click all the way into the details of the deposit Mabel created in QuickBooks and this is what it will look like. (Yours will show whatever revenue and expnese account you chose in the account mapping step.)
Step 3: If QuickBooks doesn’t show a match
- Check that you're in the correct bank account in QuickBooks. It's easy to be on the bank feed of your credit card account instead of your checking account.
-
Back in Mabel, check the account mapping settings. Is the Bank Account you chose the one Stripe actually deposits to?
- If you chose the wrong bank account in Mabel, choose the correct bank account, and save the Mappings. This will effect all payouts going forward.
- You won't be able to re-sync the payout that went to the wrong bank account, so go into QuickBooks, and search for the amount of the payout (search bar at the top of the screen). Open the deposit and update the bank account to the account Stripe actually deposits to. Click the green Save and Close button. You should now be able to match the deposit in the bank feed.
-
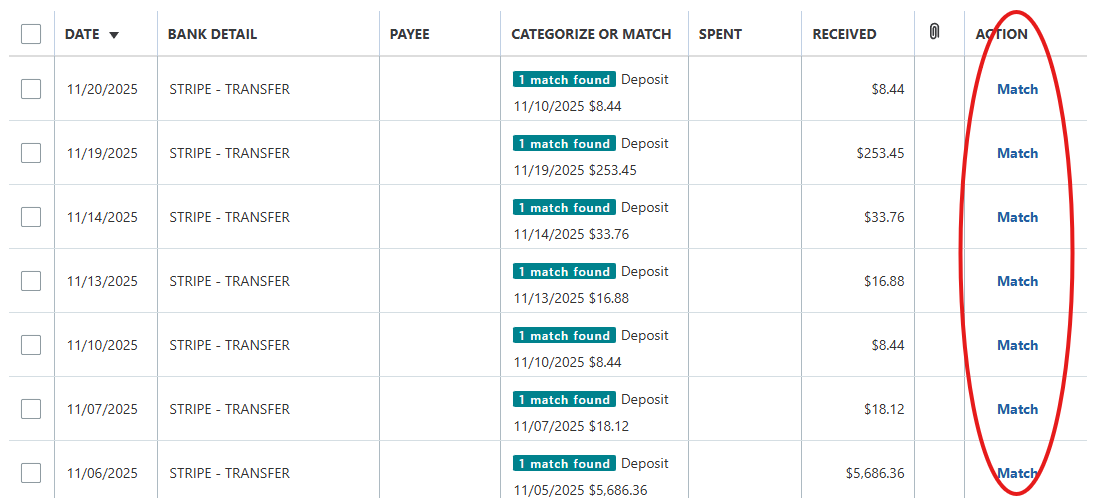
QuickBooks might be having feelings and not seeing that the deposit Mabel created matches the one on your bank feed. If that's the case:
- Click the bank transactions on the bank feed page (this shows more detail about the transactions)
- Toggle the "Match/Categorize" toggle to "Match" OR click the "Find other matches" button. Find the deposti created by Mabel and click "Save".
Step 4: Repeat for any other payouts
- If you synced multiple payouts, match each one in the bank feed.
-
Each will have it's own deposit.
You're all set!
Your setup is complete.
Going forward:
- Mabel will pull in new Stripe transactions every 24 hours, right around 6am Eastern.
- If you turn on Automatic Export, your payouts will automatically created as deposits in QuickBooks as well, on the same daily 6am Eastern schedule. The only thing you'll need to do is click "Match" the next time you go into QuickBooks to do your bookkeeping. 🎉
- If you DON'T turn on Automatic Export, you can go to the Payouts page in Mabel and click the "Send to QuickBooks" button for each payout.
👉 Optional (but encouraged!) next step: Turn on Automatic Export.